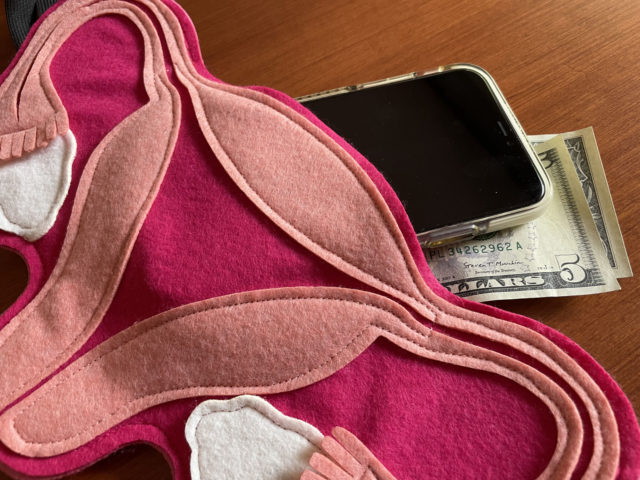
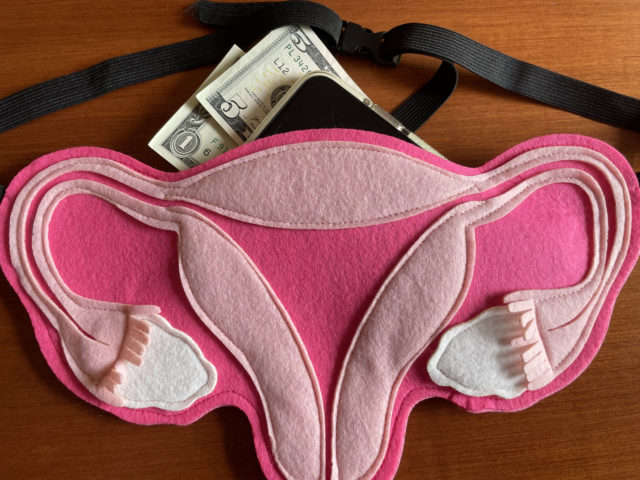
I have 9 prototypes to sell; if there’s demand, I can make more, but sewing fussy little felt bags isn’t really my vocation. Made overseas they’d be cheaper, but I’d rather support local production, which means higher labor costs.
But you can make your own! (Our laser-cut felt looks cleaner than what you’ll get cutting by hand, but it’ll still look fine and be a fun craft.)
You will need:
- 1 sheet light pink or peach felt
- 2 sheets dark pink or red felt
- 1 smaller piece white or cream felt
- elastic band
- Printer and paper
- Pins or a stapler
- A sewing machine, or a needle and thread
Instructions:
1. Download the pattern images below. Size them on your printer to MAXIMIZE FELT AREA. If that means the printer cuts off a bit of pattern at the edges of the largest piece, the backing, so be it. You can intuit where the cut curve is. On my printer I size them all at 33%. Make sure each pattern is sized by the same %age (if you size the backing at 33%, the uterus and ovaries patterns should also be sized at 33%.)
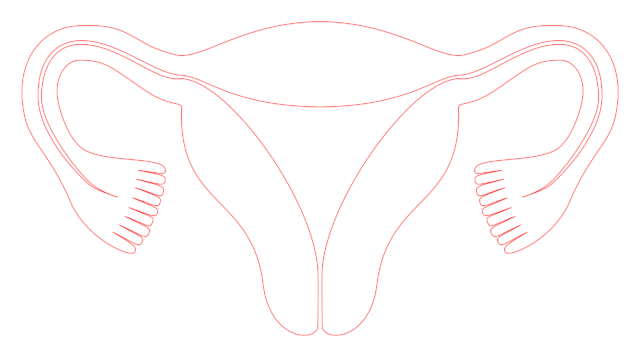
2. Pin or staple this to the sheet of light pink felt and cut out the paper and felt at the same time. Then remove pins or staples.

3. Pin or staple this to the TWO sheets of dark pink/red felt and cut them out together.
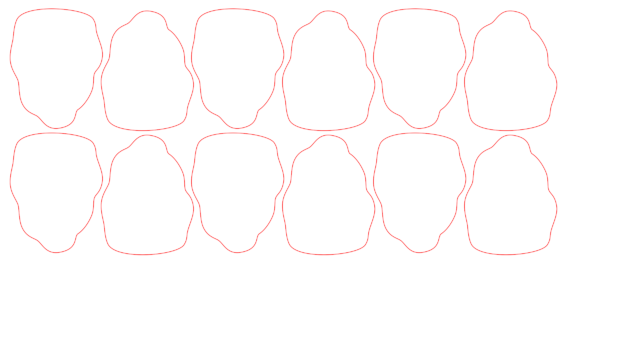
4. You only need two of the little ovary shapes above, but I arranged 6 sets of them in case you want to make several at once. At minimum, pin or staple the small piece of off-white felt to cover one pair of these, and cut them out.
5. Arrange the ovaries and uterus felt shapes on one piece of backing, and stitch them down like so. You can use pins or small dabs of clue to secure them before sewing.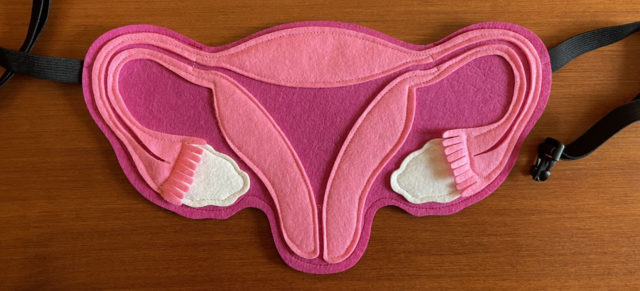
6. Cut your elastic band to a size that will fit comfortable but securely around your waist with the uterus on it. Sandwich the ends of the elastic between your sewn uterus piece and the second backing, and stitch around the edge. Leave a large opening in the top so you can get your money/phone/IDs/whatever in and out.
Your version won’t have a buckle (unless you add your own) but if the elastic band is sized right, you can slip the whole thing over your head, or step into it, and voila.
The patterns above are Free, ’cause that’s how I roll. Feel free to send me a donation if you’re into that. Paypal link is on the upper right sidebar of this blog. Thanks!

