
Please keep in mind I’m new at this, and am doing these to learn. I’m sharing “process” more than anything.
OK, so after my first quilt, Eve, I wanted to avoid binding (sewing an additional fabric edge around the quilt) at all costs. Binding is a huge drag and I hated doing it. But after this experiment, I will probably suffer binding again, because it allows more options than what I did here. Which was to first sew the 3 layers together (batting on the bottom) and then turn them inside out, like a pillowcase, so they were all “turned in” rather than raw at the edges when I started. I didn’t photograph that part, sorry.
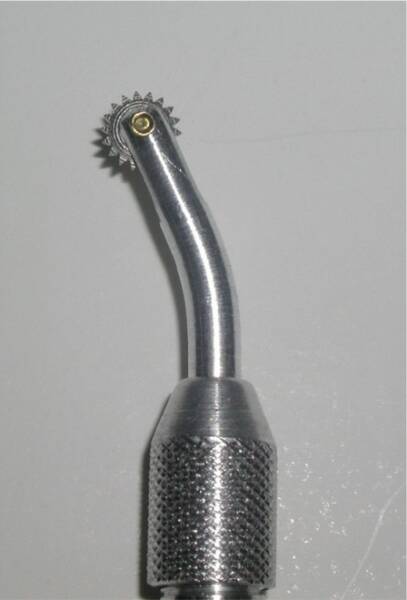
Then I wanted to try my new pounce, which is an ancient image-transfer method. Unfortunately the stupid pounce wheel I bought was useless on printer paper, so I cut a stencil with an X-Acto blade.

Yes it’s the exact same design I used before. Sue me. I thought this was going to be a quickie experiment that didn’t merit designing something new. I wasn’t planning to spend 3 days on it. Oh well. Also: the back of Eve I was all messed up, and I wanted to see what it looked like if it wasn’t all wrinkled and stuff.
Anyway, the pounced work great on the stencil and the image transferred thusly:

I actually ironed and starched this fabric before using it. I didn’t even own an iron until 2 weeks ago, and I’d never ever used fabric starch until this week. The things I do for art! Crazy. Anyway: starch works.
Next, I began sewing in all the main outlines before the chalk wore off. Little puffs of chalk dust blew up with every stitch of the needle. I wish I’d video’ed it. Conveniently, this “erased” the chalk line as the thread line went down.

Once the thread outlines were in, the chalk was pretty much off, and I could start adding details. I experimented with different colors of thread on black.

I used white thread in the bobbin, so the reverse would be white-on-white. It was two color/texture experiments at once!

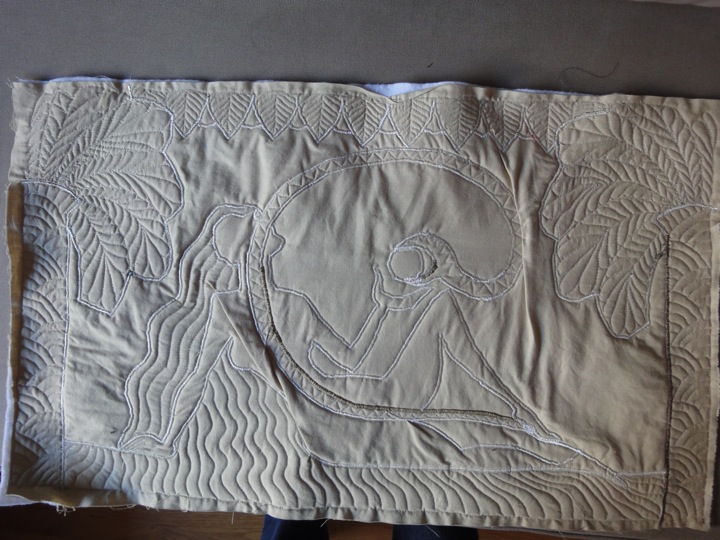
I guess even the ironing and starching didn’t fully eliminate some creases in the white cloth. Whatevs. The back looks great at this stage, but I kept going:

There’s the finished back. Looks all trapunto-y. And here’s the finished front:

All I can say is, “huh. So that’s colored thread on black. OK.” Hopefully I’ll put this learning to use somehow.
Here’s how it looks draped on my sofa:

What else can I say about it? It was nice working with a “whole cloth” rather than applique. The “quilt” (if something this small – 28.5″ x 16.5″ – can be called a quilt; I guess it is) is much softer than Eve I. Also: straight stitch doesn’t bunch up the fabric like zig zag/satin stitch. If I want bold satin stitch outlines, I’ll add them last, not first. Also: the overall size really does shrink when you quilt all over it! I guess all that fabric is going “up” into the third dimension, which is what gives it that lovely touchable texture, but it has to come from somewhere. It gets taken from x and y and added to z.

Okay, fine. I will sue you. For stealing from yourself.
This looks really nice, though. The highlights-on-black give it almost a glowy effect.
Have your lawyer call my lawyer.
I really like the design except one little detail. I happen to have a large collection of snakes and this is not how they hold apples in their mouths. As a VHEMT spokesperson.. you know. Snake. Woman. You know. SNAKE. Emphasis on SNAKE. Anyway, just kidding, great job!
I like this – it has a different vibe than Eve 1 – no preference for either one actually because of that. It might be interesting to make a giant quilt quilt of several different squares of technique – you could call it ‘All about Eve’
You must be in heaven. If not, probably very close …
This is truly gorgeous also!
That’s really beautiful. Very nice work, especially for an experiment. Put it up on eBay or Etsy and you could make some serious money off it.
awesome results, stick with this, you are a natural! a much easier way to transfer your design to fabric is this:
print your image onto either tear away or dissolve away foundation paper (these are made for paper piecing and many of them can go through a home computer printer). In a pinch, you can use regular paper.
pin the paper printing onto your fabric and batting and stabilize with a hoop or even a sheet of paper on the bottom (which will stay in permanently)
sew on the lines right through the paper. this will dull your needle a bit, but it is the fastest and easiest way I know to transfer any design to fabric.
score the sewn lines with the back of the seam ripper blade and carefully pull the paper out.
there are more tips and tricks, (shameful promotion follows) in my book
“Thread Painting” go to Amazon or my site http://www.leniwiener.com
let me know if you try it!
the quilt is gorgeous, and i love seeing how your whole process unfolded – thanks for sharing that.
You are such an amazing artist! 🙂 I love your stuff